Apatar Data Integration Web Demos

Brief overview
![]() Apatar is an open-source data integration tool delivered by Altoros to help business users, DBAs, and developers move their data in and out of numerous sources. A robust, scalable Apatar architecture enables end users to successfully solve a broad spectrum of integration needs—from extracting, transforming, and loading (ETL) for data warehousing, to migration, synchronization, and app integration.
Apatar is an open-source data integration tool delivered by Altoros to help business users, DBAs, and developers move their data in and out of numerous sources. A robust, scalable Apatar architecture enables end users to successfully solve a broad spectrum of integration needs—from extracting, transforming, and loading (ETL) for data warehousing, to migration, synchronization, and app integration.
Apatar can be used in diverse data-driven systems where you have information that needs to be captured and transferred to a new app, a data warehouse, or a single front end. The tool has a user-friendly UI and, even for a nontechnical user, it will take just a couple of hours to get trained. In addition, Apatar has a number of built-in data quality tools, enabling data cleansing, de-duplication, etc.
These demos show how to start using Apatar across the most common scenarios.
Installing components and registering
View Apatar Installation Demo…
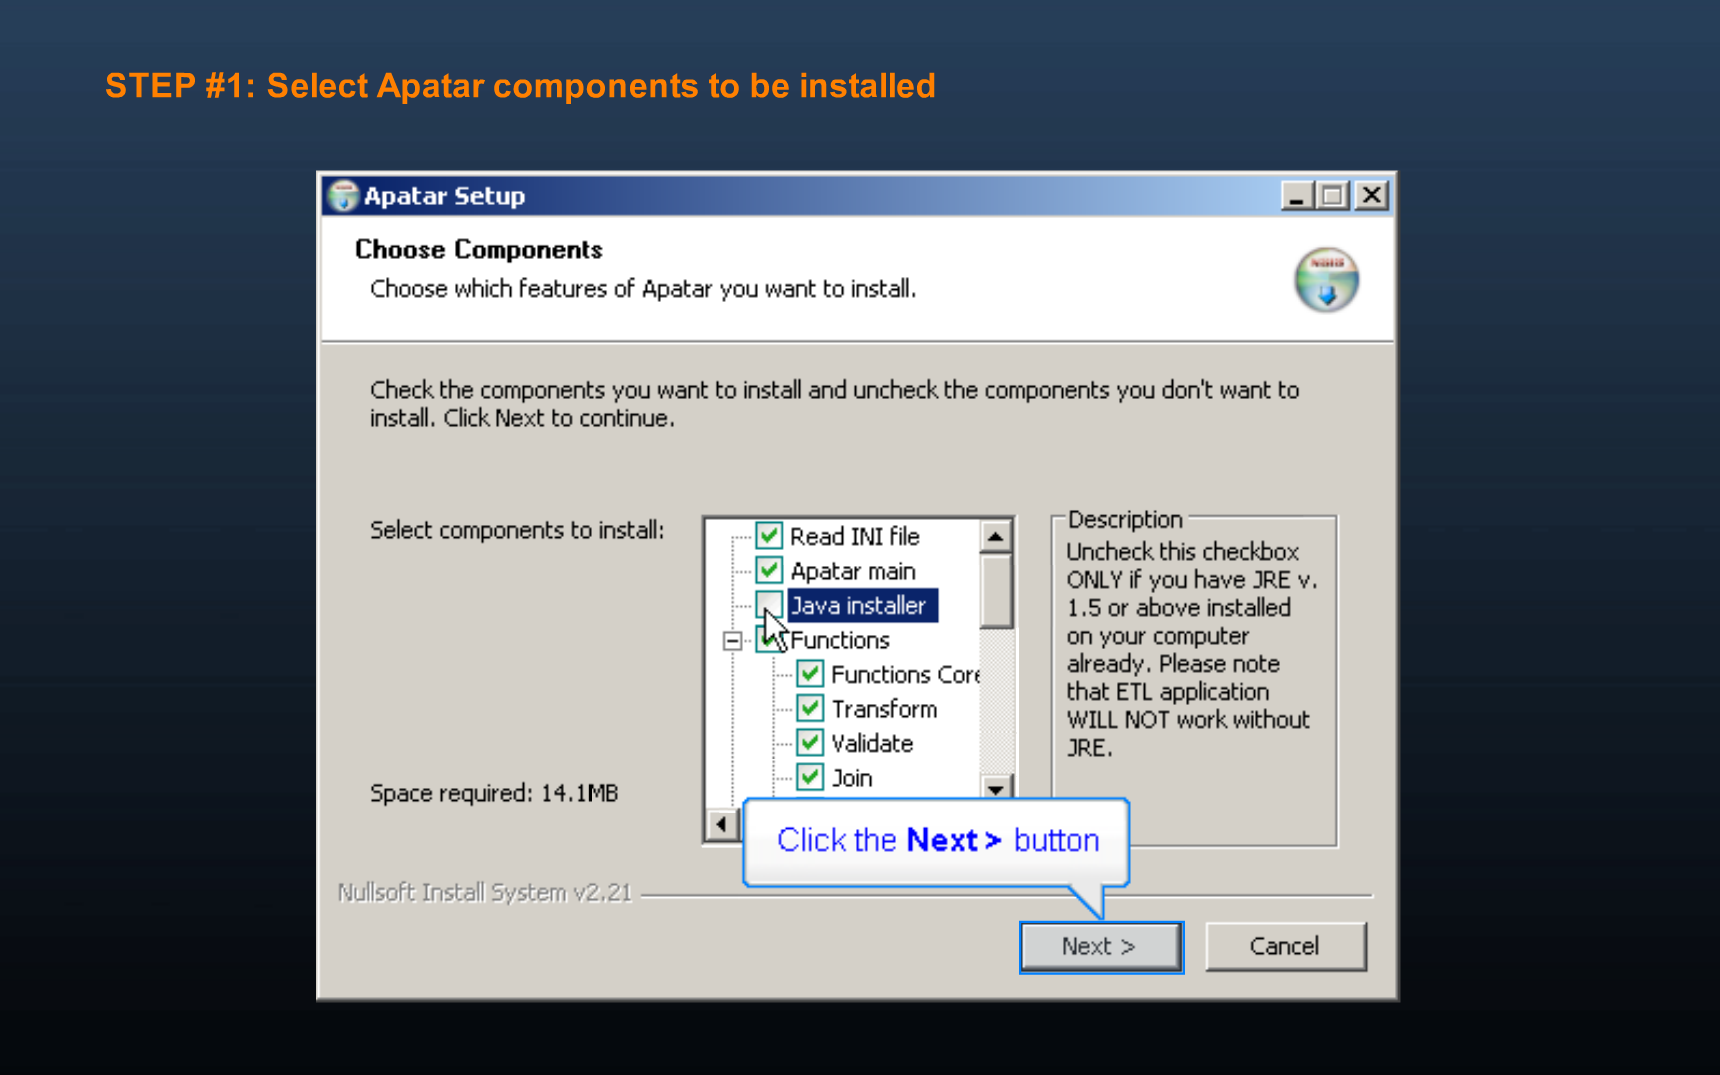 The installation process comprises three simple steps
Note: The product will require Java Runtime Environment.

Connector tutorials
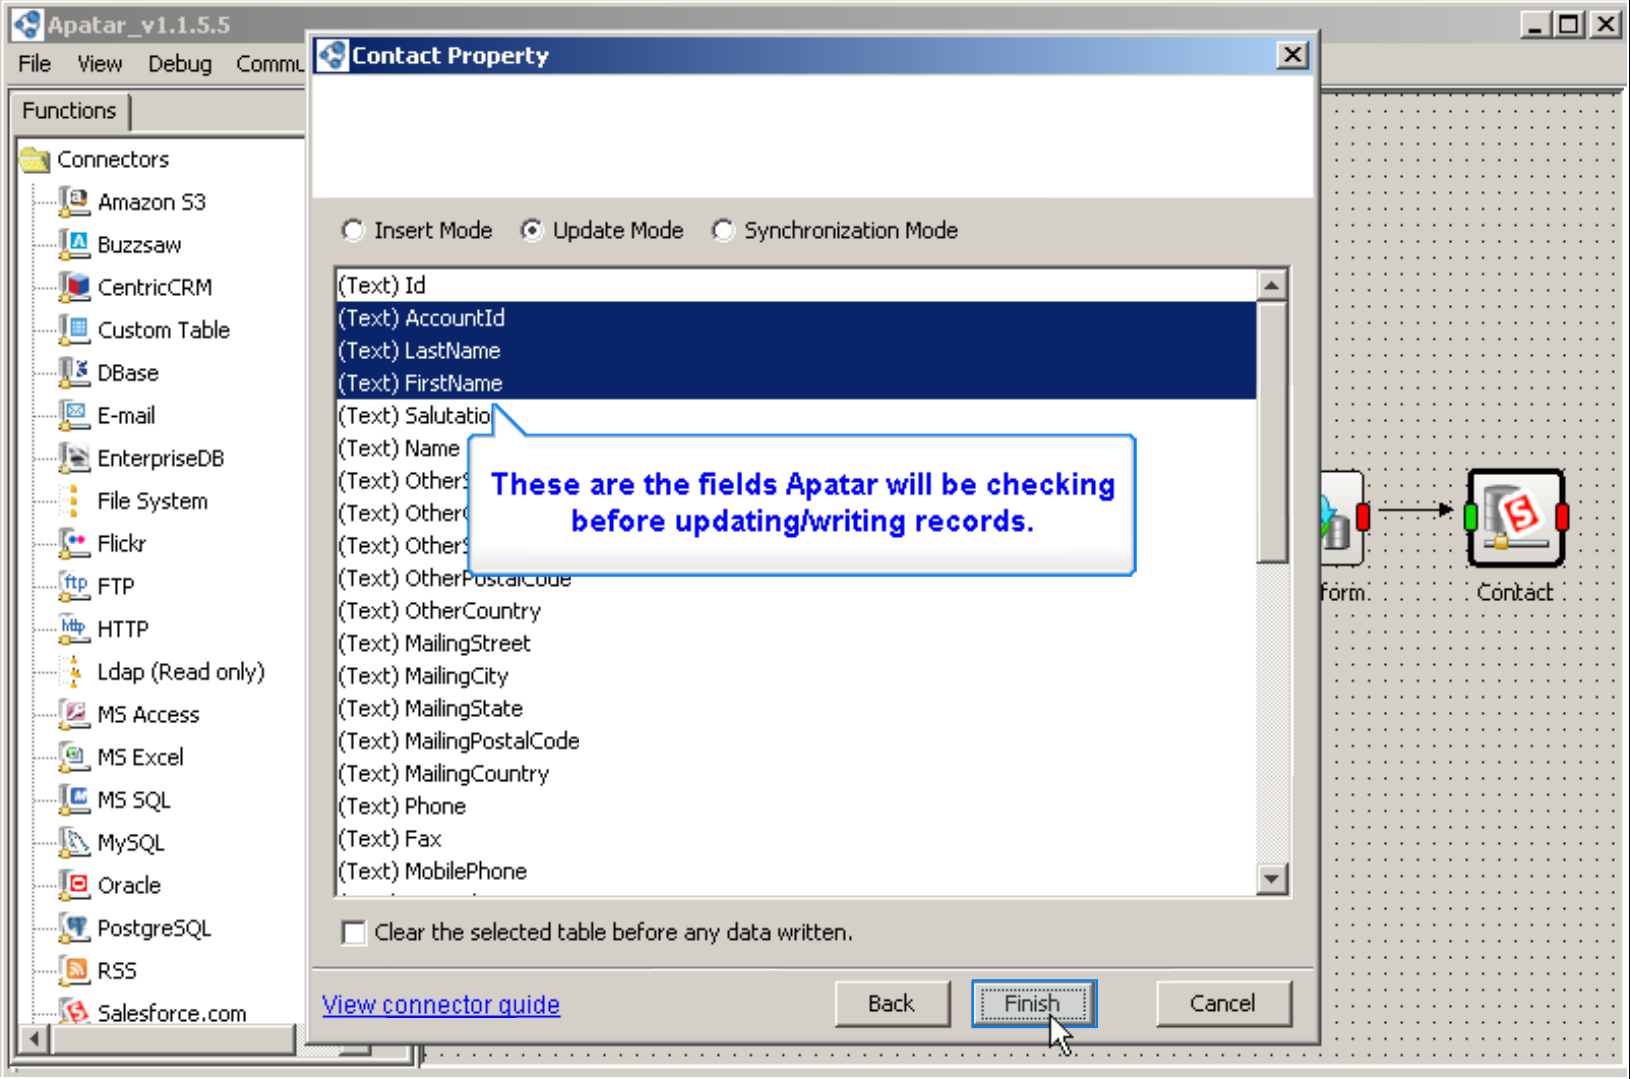
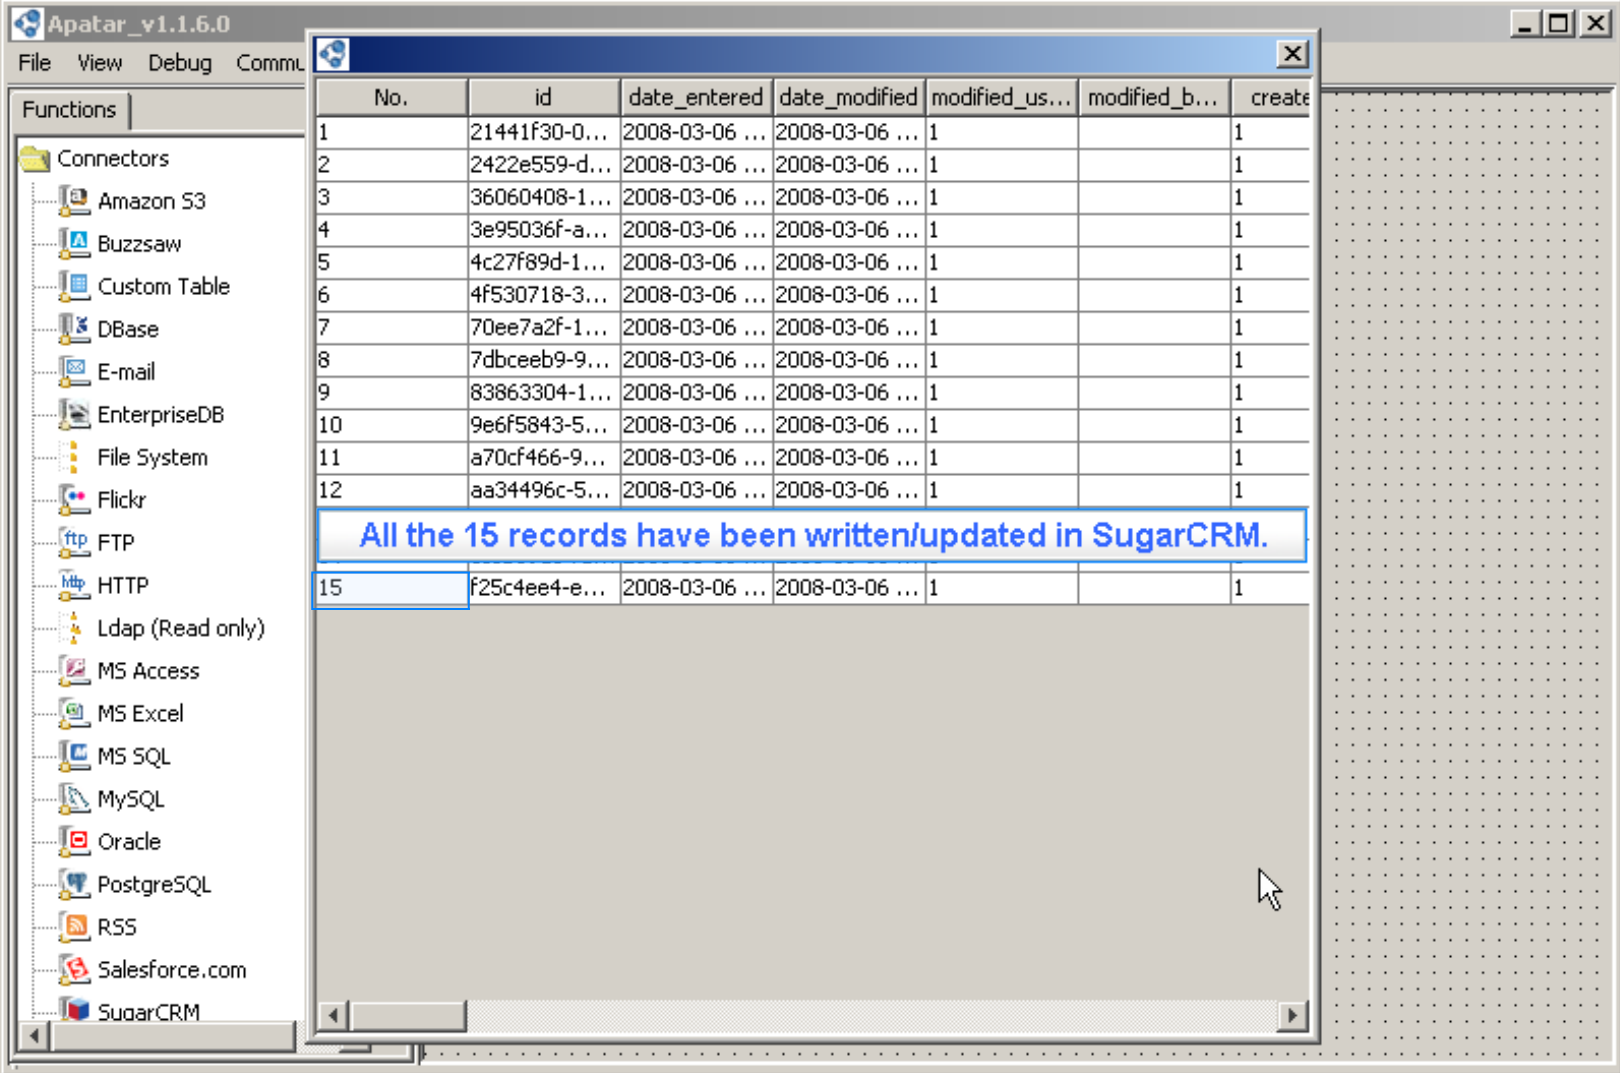
View Apatar Connector for Salesforce CRM (Populating Data)…
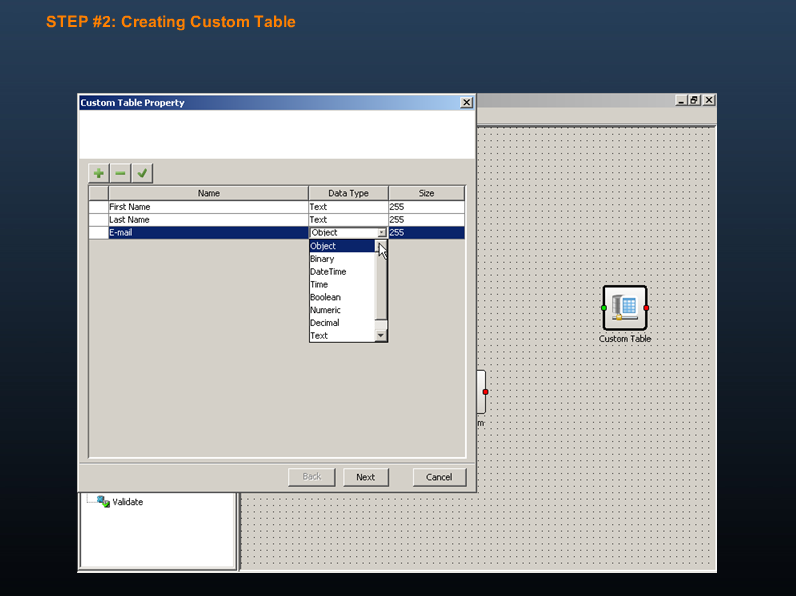
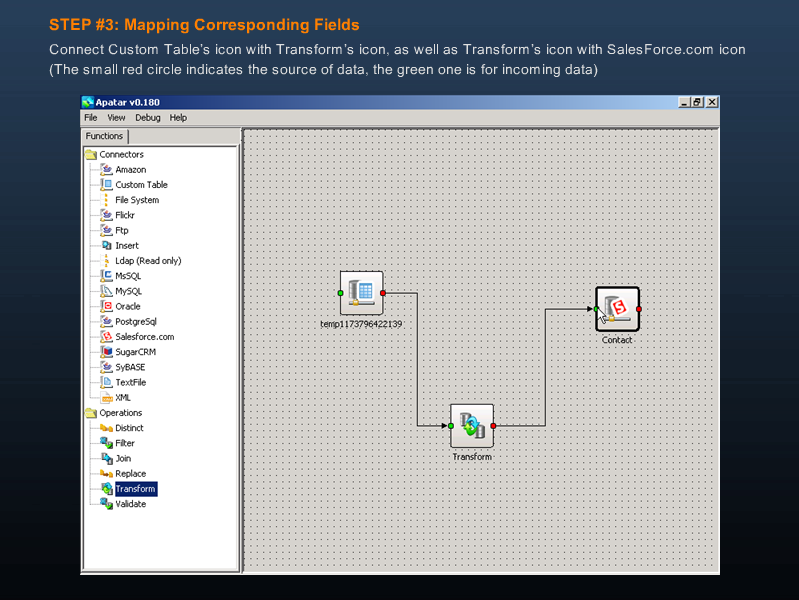 Learn how to populate data from a custom table to a Salesforce CRM contact
View Apatar Connector for Salesforce CRM (Extracting Data)…
 Extracting data from a Salesforce CRM contact to a custom table
View Apatar Connector for SugarCRM Demo…
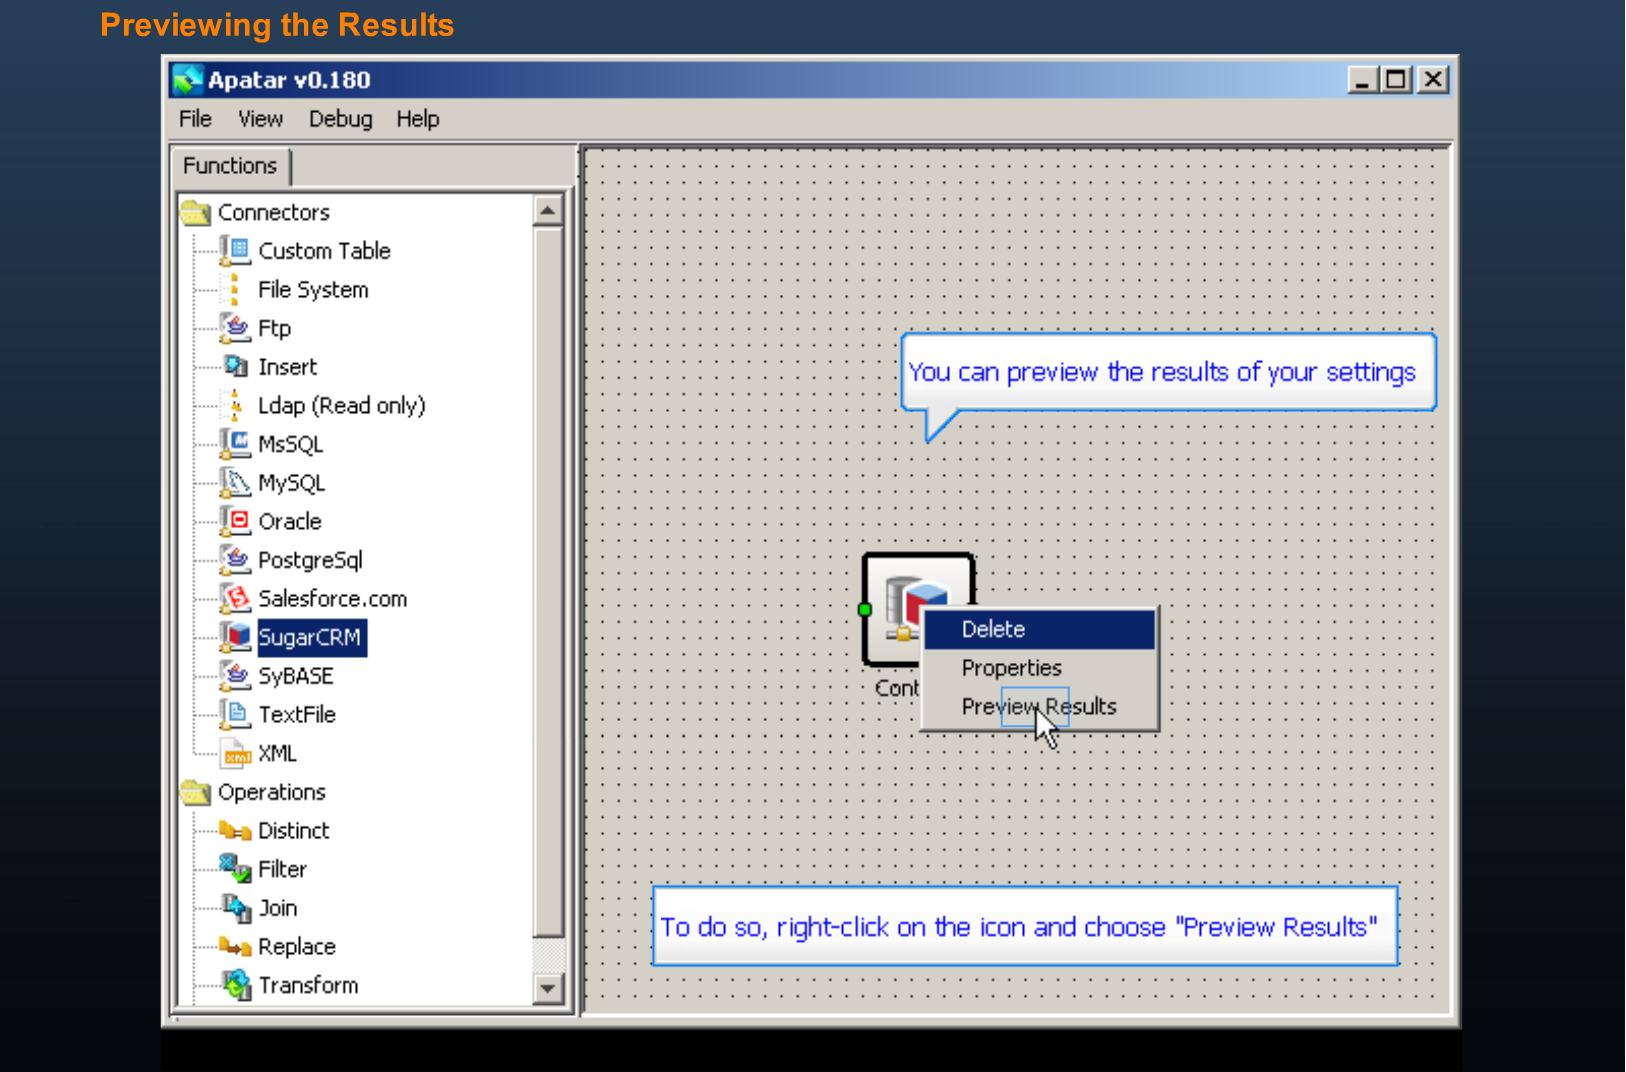 Connecting to a SugarCRM contact and previewing data
Integrating systems
View Aggregating Multiple RSS Feeds with Apatar…
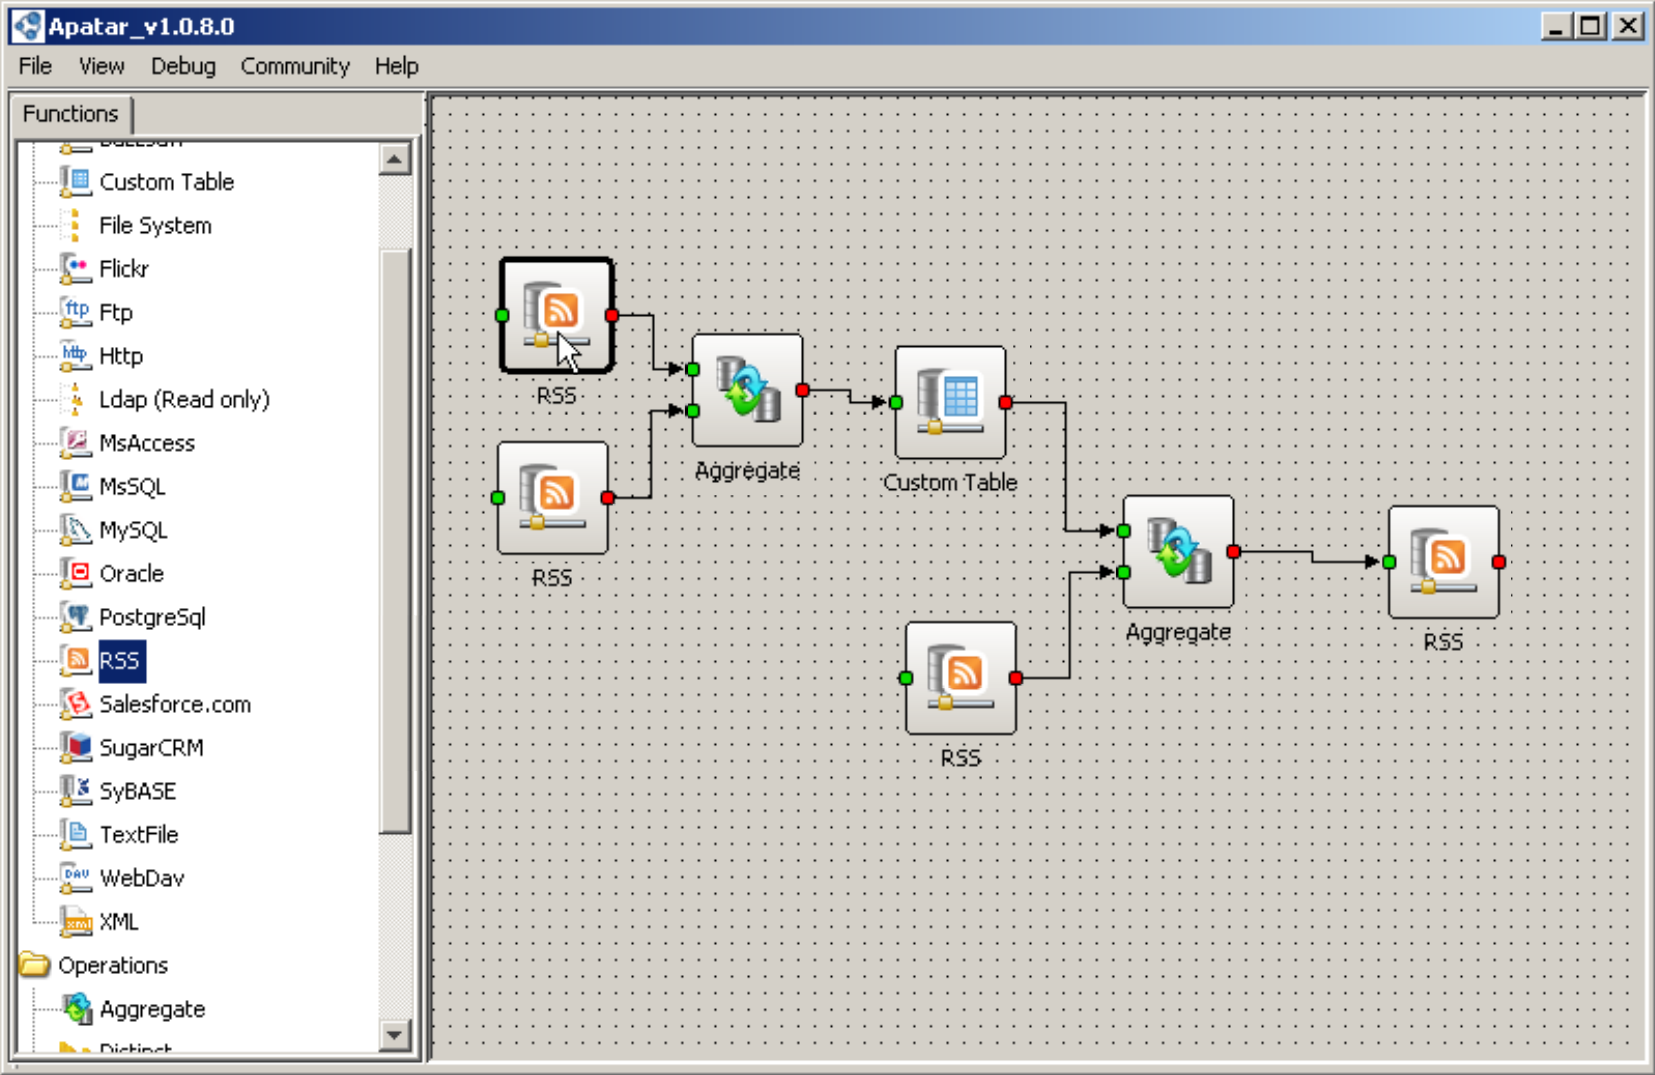 Creating a single RSS feed based on multiple news sources
View GoldMine to Salesforce CRM Integration with Apatar…
 Integrating GoldMine contacts with Salesforce CRM
View Salesforce CRM to MS Excel Integration with Apatar…
 Extracting Salesforce CRM contacts, accounts, leads, and opportunities to MS Excel
View Salesforce CRM to SugarCRM Integration Demo…
 Integrating Salesforce CRM contacts and accounts with SugarCRM
View Salesforce CRM and QuickBooks Integration Demo…
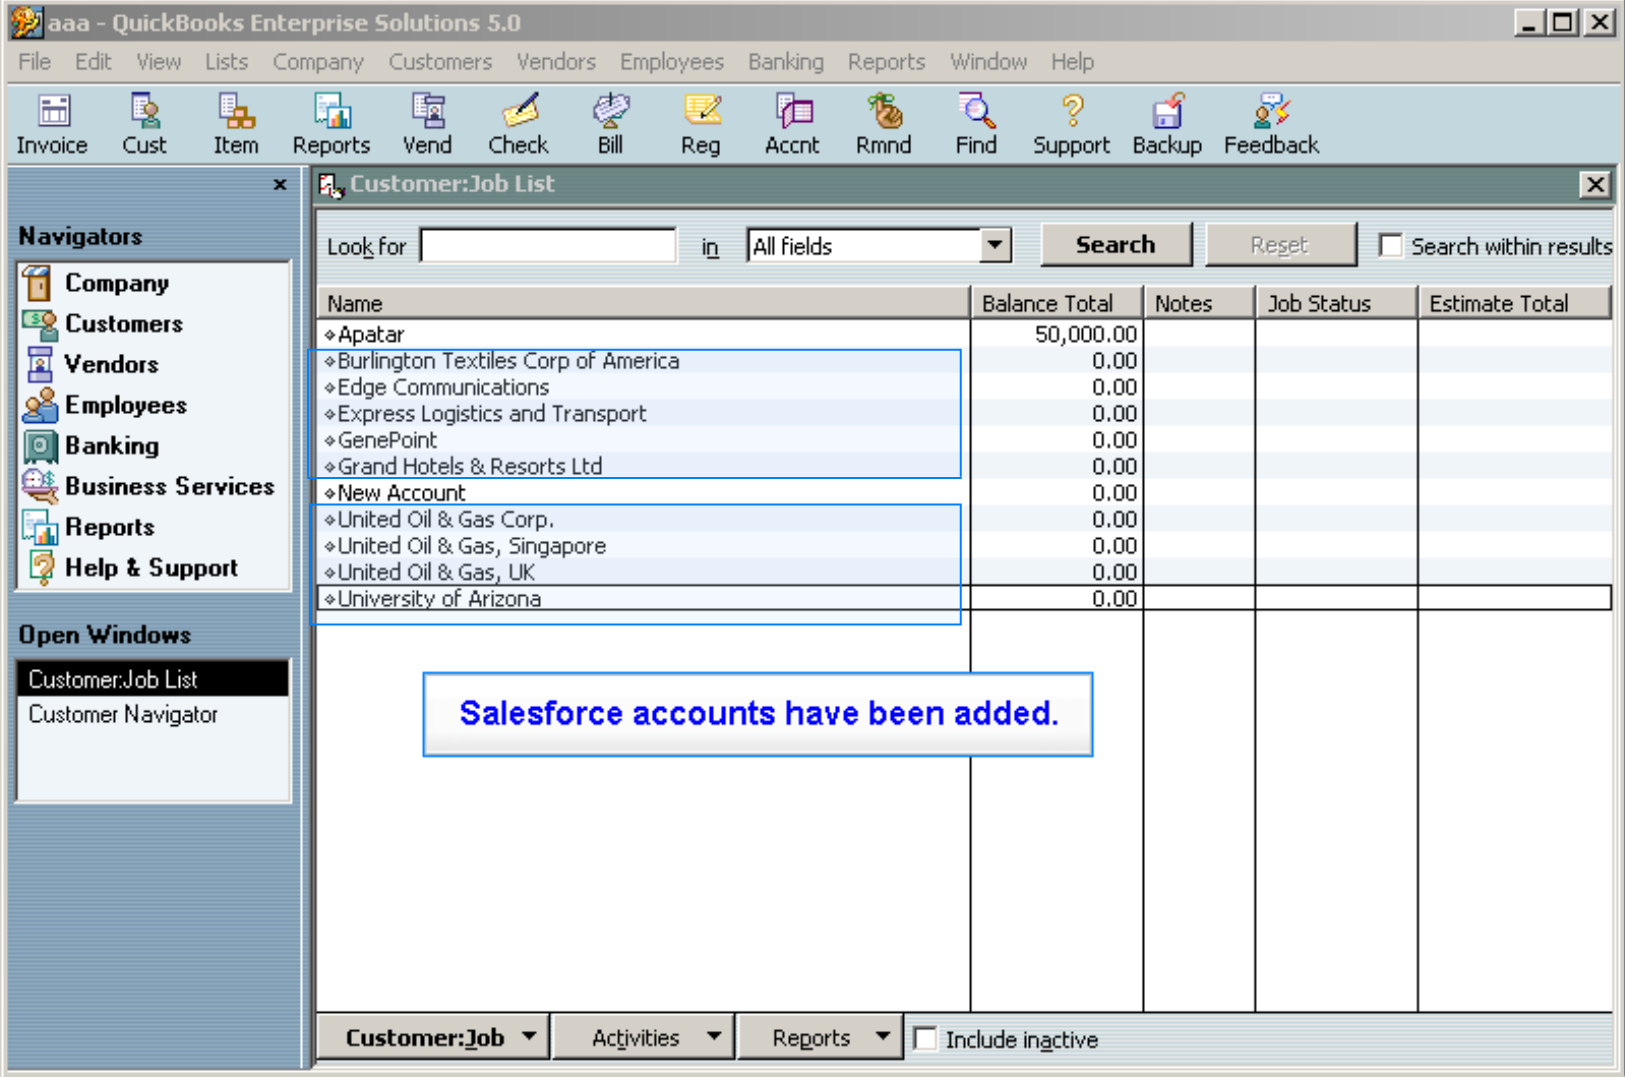 Learn how to use Apatar On-Demand synchronizing SFDC and QuickBooks
View StrikeIron Email Verification with Apatar…
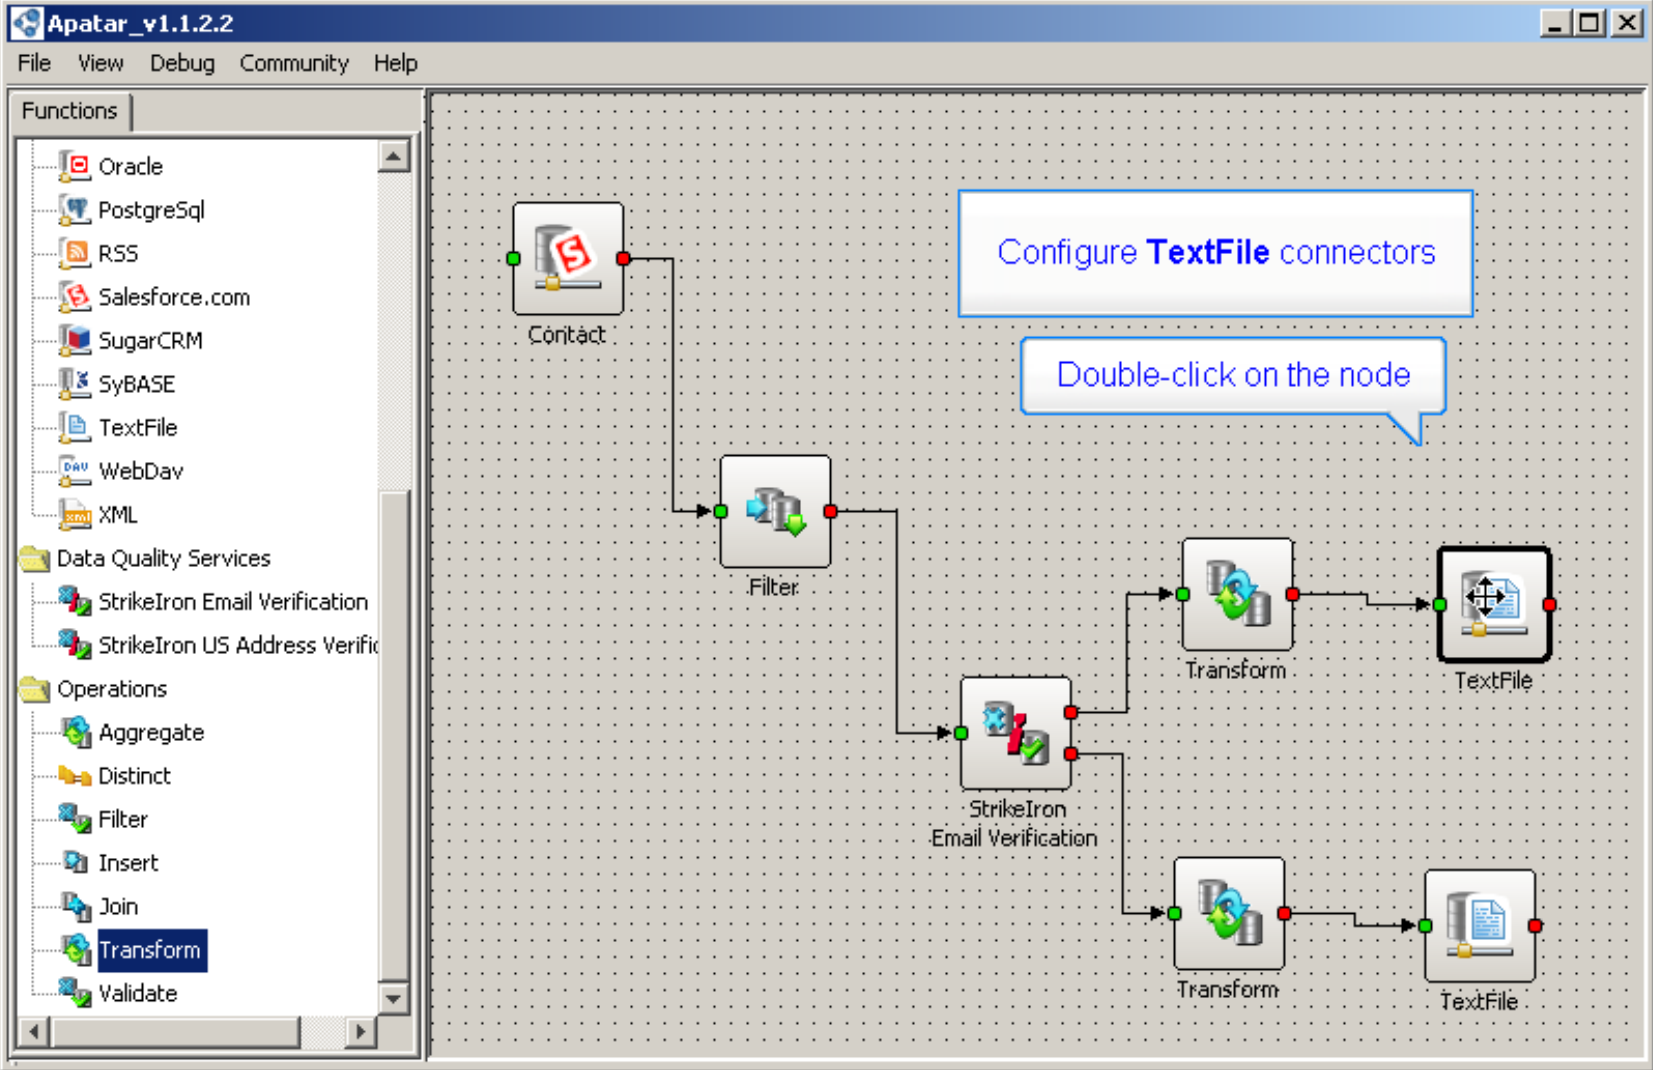 Verifying Salesforce CRM contact data with StrikeIron services
Add-ons
View Generating Customer Letters from SFDC to MS Word with Apatar Merge…
 Configuring the Apatar Merge add-on in MS Word
“Simply incredibly easy to use. As a sales manager, my technical level is really far away from the desirable to use one of these integration tools. But following the web demos of Apatar, and applying common sense, I could integrate contacts database of a client’s e-commerce with SugarCRM. For migration purposes, it is simply incredible. Continue with this job, it will be really helpful for system integrators, etc. 100% recommended.” —Julio Bleda Lуpez, Сommercial Director, ClearTIC S.L.
The latest stable release of Apatar can be downloaded at SourceForge here.
Further reading
- What Is Apatar Open Source Data Integration?
- Apatar Press Coverage 2007–2010
- Guide to Reducing ETL and Data Integration Costs by 80%